



Kate here, with a SUPER SIMPLE fun fold tutorial to set your cards apart from the rest! Today I'll be sharing with you a dutch door fold card tutorial.
Supplies:
- Marshmallow Bazzill Card Shoppe
- Snowflake paper
- Stamps and dies from Taylored Expressions
Start with a side folding A2 card (4 1/4" x 5 1/2"). This is the standard size you get when you cut a piece of 8 1/2" x11" cardstock in half.
Choose a piece of patterned paper and pre cut the layering sizes you'll need: 4" x 5 1/4" inches for behind sentiment panel (inside back flap of card), 4" x 2 1/2" inches for front flap (front side bottom flap), and 2" x 3" for layering behind the stamped snowman.

Next, you are going to cut off the upper half of the card front (just like a dutch door). Measure down 2 3/4" from the top and cut down along the fold and straight across.
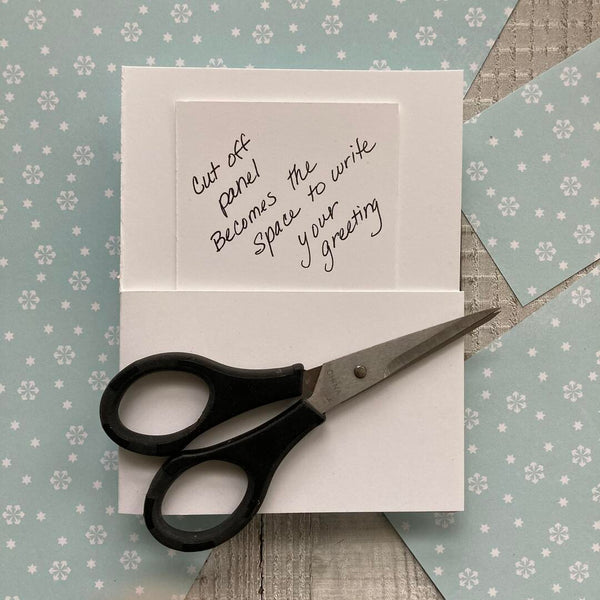
This cut off piece now becomes the sentiment panel for the inside of your card. Adhere it to the inside back of the card (this is the piece stamped with "sending flurries of love" below).

Use a separate rectangle of cardstock (2 1/4" x 3 1/4") to build your focal image on the front of the card. Layer the patterned paper on top of this and then your stamped design.
I placed another solid rectangle on the back of this focal rectangle (on the inside of the card) to give it a more finished look, but you can layer this however you'd like!

I hope this dutch door fold card tutorial was helpful and that you are already dreaming up your own creations!
-Kate


I LOVE your cards! & the ‘easy to follow’ directions! Some people share the directions in a way that is so difficult it becomes discouraging…. Your way encourages me… THANK YOU!
I love snowmen and I love making cards… this is a great design. Thanks.
Thanks a bunch! I always make A2 cards and have wanted to branch out. Now I can with your instructions! 👍🏼
The snow hill is a diecut from My Favorite Things (I believe—it’s been in my stash for quite sometime). There’s lots of “hill/scene building” dies out there on the market. This one has faux stitching.
You didn’t talk about how you made the snow “hill” with cuts in it that the stamped snowman is setting on. How did you make that? Thanks!
Leave a comment