



Hello! Kate here! In my endless search for "Fun Fold cards", I came across several Diamond Fold cards, but they were very intricate. I was afraid that the recipient wouldn't quite get it and would not appreciate all the work I put into it.
Come with me as I show you a quick Diamond Fold card that you can make in no time flat! And this card still fits in an A2 envelope!
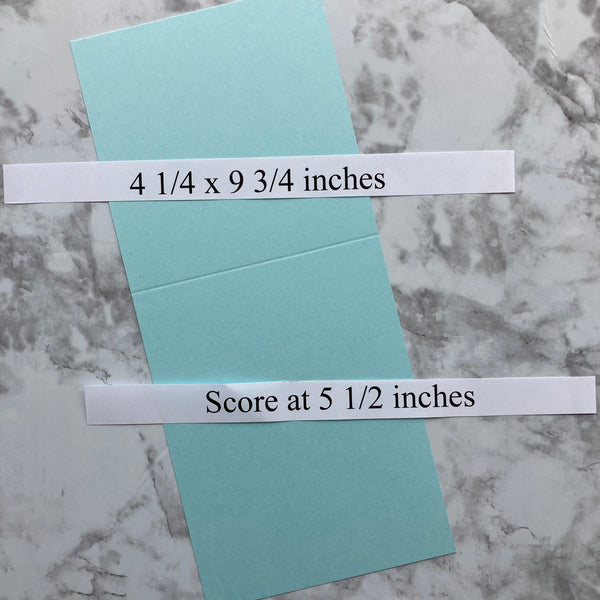
To Assemble Card Base:
1. Cut cardstock to 4-1/4 x 9-3/4 inches (I used Bazzill Smoothies in Ocean Breeze).
2. Score this card base at 5-1/2 inches.

3. Mark above and below the score line at 2-1/8 inches with a faint pencil line.

4. Connect these faint marks by scoring diagonally from opposite marks to create an X in the center of the card

5. Push in at score lines to create a pointed shape when folded.

Now you just need to make the top part a diamond by measuring 2 1/8 inches on top and sides and trimming off the corners

Finishing the card:
1. Cut a piece 4 x 5-1/2 inches ( I used Bazzill Smoothies in Coconut Swirl).
2. Mark at 2 inches along the top (essentially the halfway mark) and then mark at 2" down on either side (you are forming a triangle). Following the example above on the right, cut from each side mark to the center mark to create a pointed end insert for the inside of your card.

3. You will also need a white square measuring 2 3/4 x 2 3/4 inches for the inside of the card (the underside of the main diamond) and a piece of 2-3/4 x 2-3/4 inches patterned paper to decorate the outside diamond.
In addition, cut a 1 x 4 inch patterned paper for the edge of the white insert. This will show when the card is folded.
Bonus Tip:


Merci pour ce tuto
Je suis en France région Vendée.
Je vais traduire ce tuto et réaliser cette carte avec plaisir.
Annick.
Love this gold. Thank you so much for sharing
Very cute card!
LOVE this fold!! Thanks for sharing!
Jana-
Steps 2 and 3 show this part of the project. You mark 2 1/8" above and below the score line on both sides, then draw an x from above the fold line, to below the fold line on the opposite side. And repeat for the other line. This essentially creates an x over the score line as seen in the photo below step 3.
Leave a comment