

Hello! I want to share a fun and whimsical watering can I made. The pattern is from My Scrap Chick. It is their Monthly Freebie this month! If you want to get the pattern for free hop over there, sign up for their newsletter and you will get it for free!
When I received the new Neenah Stardream in Fairway Green I knew the watering can would be perfect to make with it. It has this beautiful summery green grass shimmer as if you are using the watering can to water your fresh summer flowers and plants.


So, let's make this beautiful watering can!
Supplies Used:
Neenah Stardream Pearlescent Cardstock in Fairway
Bazzill Mono White Cardstock
Bazzill Ballet Dotted Swiss Cardstock
American Crafts Pink Paisley Cardstock
Prima flowers and roses
Catherine Pooler Inks
I started the project by cutting out all my pieces, in the colors I wanted them, with my Silhouette Cameo 3. You can use any cutting machine or even use the PDF and cut by hand.


Once I have all my pieces cut and gathered, I like to ink all my pieces to bring more depth to my 3D piece.

This is NOT something you HAVE to do. It is optional. I use Catherine Pooler Inks. They are a Dye ink that stay wet a little longer than most so you have a bit of time to blend them. I LOVE THEM!

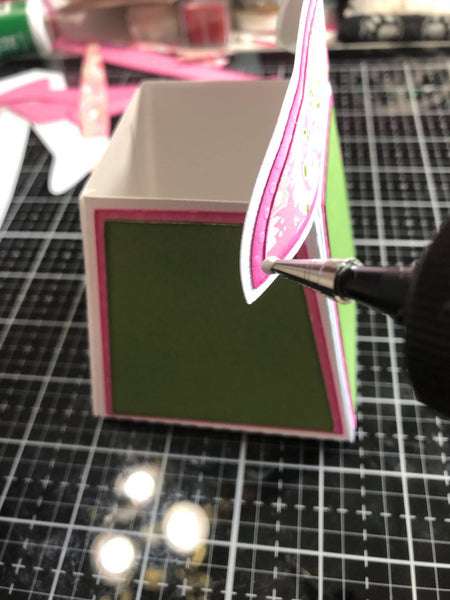
Take your bottom layer of your panels and glue the top layers of your panels to them. Making sure to keep them centered and even on top of one another.


Thank you for joining me today and until next time!
-Christi

6 comments
Recent Blogs
Featured Blogs
Categories
3D Paper Projects
4th of july
Acetate
Adhesive
American Crafts Cardstock
Baby
Back to school
Banners
Bazzill
Birthday
BoBunny
Cake Topper
Card Making
Card Templates
Cardmaking
Cardstock
Carta Bella
Christmas
Core'dinations Cardstock
Crafts For Kids
Cricut
Cricut & Silhouette Crafting
Cutting Tips
DCWV
Deisgn Team Member Monica Rodriguez
Design Team Member Amanda Lace
Design Team Member An Pham
Design Team Member Annie Chinoy
Design Team Member April Gonzalez
Design Team Member Brenna
Design Team Member Carrie
Design Team Member Cherie Dalton
Design Team member Christi Steinbeck
Design Team Member Jannet Furman
Design Team Member Jessica Perez
Design Team Member Joselyn Sierra
Design Team Member Kandce Johnson
Design Team Member Kandice Johnson
Design Team Member Kate Deignan
Design Team member Kathleen Eifert
Design Team Member Manasa Vavilapalli
Design Team Member Michelle Price
Design Team Member Naomi Krush
Design Team Member Pam Giles
Die Cutting
Dimensional Paper Projects
DIY
Doodlebug Designs
Dreaming Tree
Easter
Echo Park
embellishments
Encore Cardstock
Envelopes
Fall
Father's Day
Foil Cardstock
Foil Quill
From the Owner Lynette
Fun Fold
Genealogy
Gifts
Glama Translucent Vellum
Glitter Cardstock
Graduation
Halloween
hat
Holographic Cardstock
Masculine Crafts
Memento Ink
Mini Album
Mirri Cardstock
Mother's Day
mulberry paper
Neenah Classic Crest
Neenah Stardream
New Years Eve
Paper Craft Tips
Paper Flowers
Paper Party Decor
Paper Piecing
Paper Tags
Paper Weight
Patriotic
Patterned Paper
Princess
Rubber Stamping
Scrapbook Layout
Scrapbooking
Scraps
Shaker Card
Silhouette
Simple Stories
Sirio Cardstock
Skin Tone Cardstock
Spring
St. Patrick's Day
Stamping
Summer
SVG
Teacher Appreciation
Technical Info
Teens
Thanksgiving
Tutorial
Valentine's Day
Vellum
Video
Wedding
Winter
Woodgrain Paper


This is beautiful!
This is a beautiful project!
Wow- amazing
I can’t wait to do this project and set it on a shelf in my bedroom I have the perfect spot
Your watering can is just amazing. Such great pictures of how it went together as well. Love, love, love it!
Leave a comment