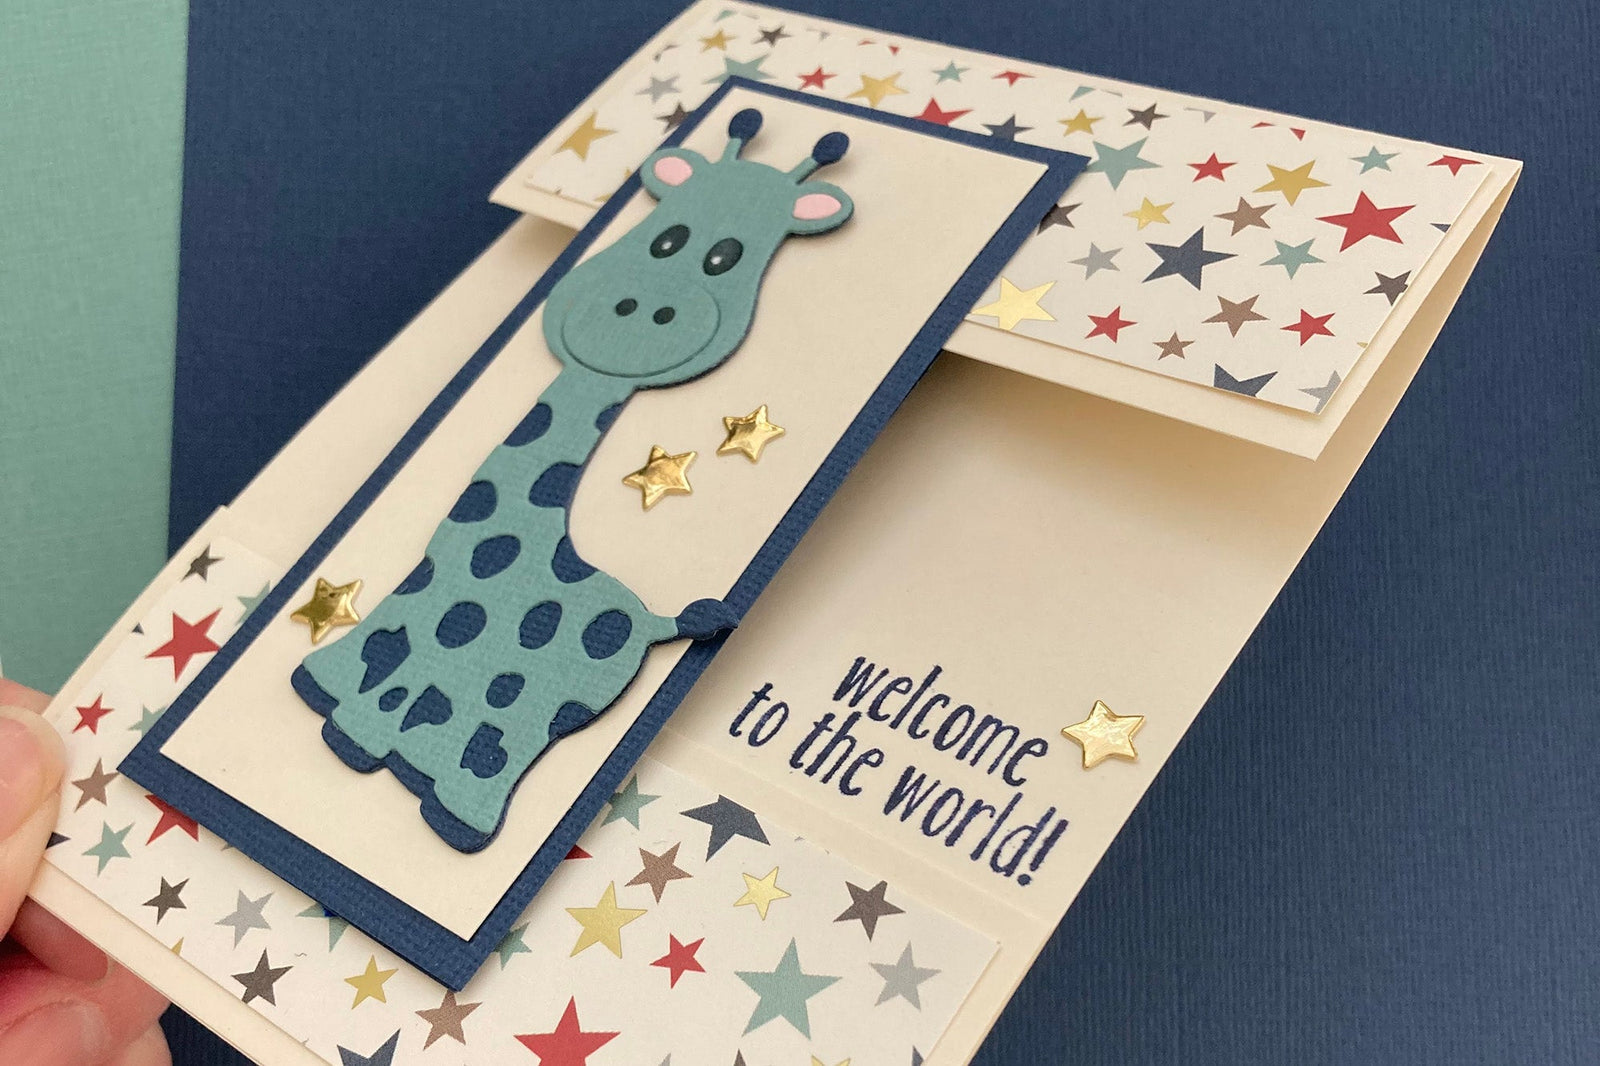
Design Team Member Kate here with a quick and easy fun fold card idea. I love to create card templates that can be used again and again for every kind of occasion and this handmade card template certainly fits that description. I used a giraffe die cut on my card, but you can substitute ANYTHING you have instead. Grab your supplies and let's get started.

Supplies:
- Encore Cardstock in Lapis and Sea Glass
- Echo Park Foil Stars (Petticoat & Pinstripes by Lori Whitlock)
- Bazzill Card Shoppe in Butter Mints
- Mirri H Gold Foil Cardstock
- Giraffe Die from Brutus Monroe
Floating Panel Fun Fold Card Instructions

To begin, cut your pieces as follows:
- 4 1/4" x 7-1/4" card base, scored at 5-1/2" (mine is Cream)
- 1-3/4" x 4-1/4" in same color as card base
- 1 1/2" x 4" patterned paper, cut 2 pieces
- 2" x 4-1/4" for background of floating panel (cut 2 to make it sturdy - mine is Navy)
- 1-3/4" x 4" for background of focal image

When you cut your pieces according to the instructions above, you will have a card base with one flap. The flap of the card base belongs at the top of the card. This flap holds the floating panel. Adhere one of the patterned paper panels to the top card flap.

To make the floating panel, adhere one of the two pieces of 2" x 4 1/4" (navy blue in my case) to the top flap of the card, and one on the back of the flap, lining them up perfectly together to form one sturdy piece. Next, adhere the smaller 1 3/4" x 4" piece onto the front of the floating panel.

The front of this flap is were you will add your diecut, stamped image or whatever you are using for your focal point.

The bottom panel is just attached flat on the card base to mimic the top folded panel, though it does not open at all. It just provides a decorative element for the card.

Add your sentiment to the inside of the card opposite the flap so it shows through to the front. If you want to write a message inside the card, you can do so beneath the flap on the inside of the card. You could even add a lighter piece of cardstock to the back of the floating panel so you could write more inside the card.
Bonus Tip: *You can move the focal image to the middle of your card, or either side. You could even change the shape (square, heart, etc.)
-Kate
Here's another fun fold card idea!
5 comments
Recent Blogs
Featured Blogs
Categories
3D Paper Projects
4th of july
Acetate
Adhesive
American Crafts Cardstock
Baby
Back to school
Banners
Bazzill
Birthday
BoBunny
Cake Topper
Card Making
Card Templates
Cardmaking
Cardstock
Carta Bella
Christmas
Core'dinations Cardstock
Crafts For Kids
Cricut
Cricut & Silhouette Crafting
Cutting Tips
DCWV
Deisgn Team Member Monica Rodriguez
Design Team Member Amanda Lace
Design Team Member An Pham
Design Team Member Annie Chinoy
Design Team Member April Gonzalez
Design Team Member Carrie
Design Team Member Cherie Dalton
Design Team member Christi Steinbeck
Design Team Member Jannet Furman
Design Team Member Jessica Perez
Design Team Member Joselyn Sierra
Design Team Member Kandce Johnson
Design Team Member Kandice Johnson
Design Team Member Kate Deignan
Design Team member Kathleen Eifert
Design Team Member Manasa Vavilapalli
Design Team Member Michelle Price
Design Team Member Naomi Krush
Design Team Member Pam Giles
Die Cutting
Dimensional Paper Projects
DIY
Doodlebug Designs
Dreaming Tree
Easter
Echo Park
embellishments
Encore Cardstock
Envelopes
Fall
Father's Day
Foil Cardstock
Foil Quill
From the Owner Lynette
Fun Fold
Genealogy
Gifts
Glama Translucent Vellum
Glitter Cardstock
Graduation
Halloween
hat
Holographic Cardstock
Masculine Crafts
Memento Ink
Mini Album
Mirri Cardstock
Mother's Day
mulberry paper
Neenah Classic Crest
Neenah Stardream
New Years Eve
Paper Craft Tips
Paper Flowers
Paper Party Decor
Paper Piecing
Paper Tags
Paper Weight
Patriotic
Patterned Paper
Princess
Rubber Stamping
Scrapbook Layout
Scrapbooking
Scraps
Shaker Card
Silhouette
Simple Stories
Sirio Cardstock
Skin Tone Cardstock
Spring
St. Patrick's Day
Stamping
Summer
SVG
Teacher Appreciation
Technical Info
Teens
Thanksgiving
Tutorial
Valentine's Day
Vellum
Video
Wedding
Winter
Woodgrain Paper


I tried it! I like it! Came together so cute! Thank you.
Absolutely adorable. Thank you for sharing your cards and other items.
This is a really cute card! Thanks for sharing. Question…in the pictures it appears that the two navy pieces of card are attached together but also to either side of the flap. This is not what the directions indicate you should do, so I was wondering. Thanks again!
I am confused on a couple of things for the floating panel card. 1. How far down do you make your score line at the top of the card? 2. How do you attach the floating panel? The pic shows the navy rectangle piece attached to the back side of the flap, but the written instructions tell how to make the floating panel but not how to attach it to the card. Please help. Thanks.
Such a cute card! Thank you so much for the tutorial.
Leave a comment